
Most people have one: a bulky dresser shoved in the corner, a wobbly chair that’s been “about to be dealt with” for months, or a bed frame that finally has to go.
The problem isn’t motivation. It’s not knowing where to start.
Taking apart old wood furniture isn’t complicated — but it does require the right approach. Rush it, and you’ll split good wood or strip screws. Do it properly, and the whole thing comes apart cleanly in under an hour.
Here’s exactly how to do it.
What You’ll Need Before You Start
Don’t begin until everything is within arm’s reach. Stopping mid-disassembly to hunt for a tool is how accidents happen and wood gets damaged.
Here’s what to have on hand:
- Flat pry bar — for stubborn joints and tight seams
- Hammer — for tapping, pulling nails, and working the pry bar
- Screwdrivers (flathead and Phillips) — old furniture uses both
- Pliers — for gripping and pulling out resistant hardware
- Heat gun or hair dryer — essential for breaking down old glue
- Small handsaw — only when nothing else works
- Work gloves — old wood splinters and hardware can be sharp
- Masking tape and a marker — for labeling parts as you go
One tip before you pick up a single tool: take photos of the piece from multiple angles. It sounds unnecessary — until you’re halfway through and can’t remember which panel went where.
Step 1 — Remove All Hardware First
Before anything comes apart, strip out every screw, bolt, and nail you can see. This is the step most people skip. It’s also why they end up splitting wood that didn’t need splitting.
Start at the back or bottom — that’s where most fasteners are concentrated. Go slow. Old wood is dry and brittle, and aggressive turning strips holes fast.
If a screw won’t budge, tap the screwdriver handle gently with your palm. For stuck nails, use the claw of your hammer and rock it free — don’t yank. If the wood starts pulling up, switch to your pry bar and work from the back side instead.
As you remove hardware, drop screws and bolts into a small container sorted by size. Label which section they came from. It takes 30 extra seconds per step and saves real frustration later.
Step 2 — Work From the Outside In
Once the hardware is out, start with the largest external parts first — legs, doors, lids, side panels. These come off before drawers, interior supports, or the main frame.
Removing legs first lowers the center of gravity and makes the rest of the piece safer to work on. Taking off doors and lids early eliminates the risk of them swinging loose at the wrong moment.
If something feels stuck after all the hardware is out, stop and look again. There’s almost certainly a hidden screw, a recessed bolt, or old glue holding things together.
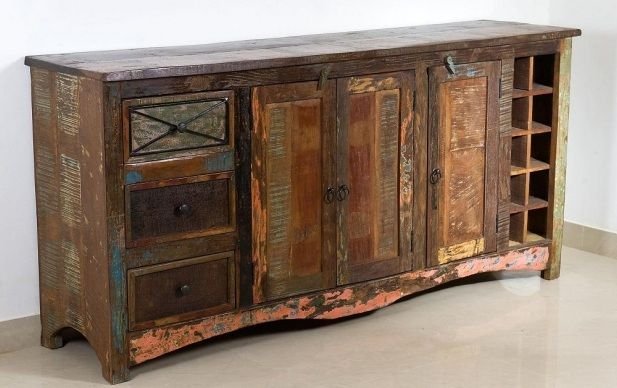
Older furniture — especially pieces built before the 1980s — often used joinery you won’t see at first glance: wooden dowels, mortise and tenon joints, corner blocks. These need different handling than modern flat-pack furniture.
Step 3 — Deal With Glue and Hidden Metal
This is the step that trips up most first-timers.
Older furniture was often assembled with hide glue or early wood adhesives that get surprisingly tough over time. Before pulling on any joint that’s resisting, apply heat first.
A hair dryer works for lighter bonds. A heat gun is more effective for thicker, older glue. Hold it about two inches from the joint, move slowly for 30–60 seconds, then test with your pry bar. You’ll feel the difference immediately.
Hidden metal is the other common surprise. Brackets, corner plates, and nail-on fasteners often hide inside corners or under trim where they’re not visible until you’re already pulling. Run your hand along every interior edge before applying force.
Step 4 — Break Down Large Panels Last
Once the outer parts are off, the remaining frame usually comes apart in a logical order. Back panel first, then side panels, then the front frame.
For large flat panels, a second pair of hands helps — not because the pieces are always heavy, but because controlling a large sheet of wood while managing a pry bar is genuinely awkward.
If you’re dismantling for disposal and don’t care about preserving the wood, you can be more aggressive here. Snap large panels over a knee or the edge of a step — this works well for thinner plywood or particleboard.
For solid wood you want to keep intact, slow down and let the tools do the work.
What to Do With the Wood and Hardware
A full disassembly leaves you with three categories: usable wood, scrap wood, and hardware. Treat them separately.
Usable wood — solid boards, clean panels, intact trim — is worth keeping for DIY projects. Wide boards make great wall shelves. Table legs can become a plant stand base. Drawer fronts work well as wall-mounted organizers or hooks.
If you don’t have a use for it, local community workshops, theater departments, and Habitat for Humanity ReStores often accept clean wood donations.
Hardware from older furniture is often better quality than what you’d buy new today. Keep screws, hinges, and drawer pulls sorted in a small parts bin.
Scrap wood and particleboard shouldn’t go in the regular trash in most areas. Check your municipality’s bulk wood disposal guidelines, or use an eco drop-off center. For large volumes, a junk removal service is usually the fastest option.
When to Call in Help
Some jobs are bigger than a solo project — large wardrobes, full bedroom sets, or antique pieces where you’re trying to preserve as much as possible.
If the volume is significant, the space is awkward, or the piece is too heavy to manage safely alone, don’t muscle through it.
A professional junk removal team can handle disassembly, removal, and disposal faster than most people can do the teardown alone.
Ready to clear the space? Give us a call and we’ll handle the heavy lifting.
The Short Version
Taking apart old wood furniture comes down to four things: the right tools, the right order, patience with glue and hidden hardware, and a plan for the materials afterward.
Follow those principles and you’ll get through any piece cleanly — without splitting wood, stripping screws, or throwing your back out in the process.